
Online Editing Tool: Shapes and Layers Tutorial

In this tutorial, we'll discuss creating a banner that sits behind a few photos. Click here for an in-depth explanation on setting up shapes and layers.
- Make sure the default menu is visible at the top. If it is not visible, click on any white space and it should appear.
- Click the “Shape” button. This will lay down a shape on the page.
- Adjust the color of the shape.
- Select the "Stack" option to access layers.
- Choose the "Send Backward" option. Image block should still be visible. Continue sending backward until it is behind all three images.
- Adjust the transparency of the banner. This option can be found within the color section of the toolbar. Set the transparency via slider. This will set the opacity of the shape.
Quick Note:
You have the option to "Send to Back" or "Send to Front," which moves the chosen item directly to the back or to the front. Selecting "Bring Forward" or "Send Backward" moves the item one layer at a time.
Need help?
Our Customer service team is ready to come to the rescue:
Call us: +(866) 777-3986
Monday through Friday 8:00 AM - 5 PM PST
Email: CS@Corefact.com
Related topics

Online Editing Tool: Setting Up Shapes and Layers
Learn about creating shapes and layers using the Corefact online editing tool.
Read More
Online Editing Tool: Image Border Tutorial
Learn how to add an image border and remove shapes using the Corefact online editing tool.
Read More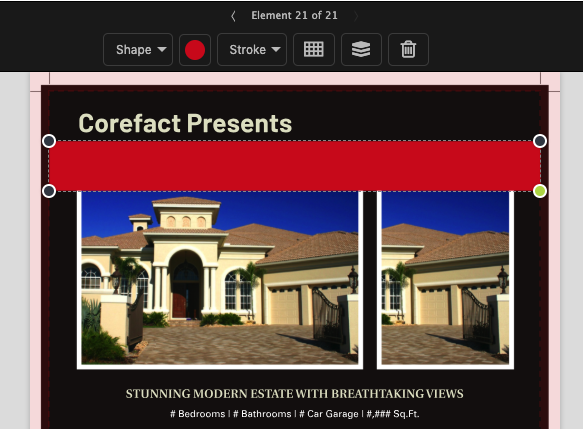
Online Editing Tool: Shapes and Layers 101
Learn all about editing and managing shapes and layers using the Corefact online editing tool.
Read More